Now the Lord is the Spirit, and where the Spirit of the Lord is, there is freedom.
1 Corinthians 3:17
Showing posts with label home improvement. Show all posts

Wednesday, August 23, 2017

4 Money-Saving Landscaping Tips and Our Backyard Progress

With school starting next week, summer is nearly done. And you know what? I'm ready. ;)

We've been here for about a year and a half, and I love how things are looking outside. I've made my lion's share of mistakes at our other homes' so this time around, I feel like I know exactly what I want, and I don't have to factor in too many re-do's to make it happen.

There were two large (and horrible) trees in the fenced in area beside the pool when we moved in. I can't find a picture now, of course, but if I do, then I'll add it. They looked just awful. A real thorny, overgrown mess, and one was completely bare from the middle down. I'm thankful those were the only things we had to contend with, not like our last house. Ugh. ha ha

When those two were removed, we were starting with a clean slate. Sort of. The stumps and roots were huge and we were nervous about digging so close to all the pipes and wires for the pool, so I designed a plan to simply hide them. It's working great!


TIP #1:
Stagger your bigger plants and bushes along the back

Such a simple thing but it adds incredible depth to your garden beds. It also helps to disguise trouble spots, like hiding pool equipment.

The stumps are right behind the arborvitae, barely noticeable even when standing right in front of the garden. The photo below shows an angled view, but the arborvitae have skyrocketed this month and cover them so much more. This was taken in June, when the roses are in full bloom but the day lilies are just beginning to bud up.

I purchased those two ever-blooming rosebushes from Lowe's last year, and they are incredible! Like, truly incredible. They have a slow period in July but have since perked right back up. I LOVE them!

Then the lilies peak and add gorgeous color and fragrance. The butterfly bush on the right (in back) is just beginning to grow- I was getting worried about it, but now it's huge! Also, I can't seem to grow Veronica very well, and I just may have to find something else purple to take their place. Any tips for me?


Yeah, it looked great for about two weeks, and then it dies a long, slow, painful death. Now it's just a clump of brown mini stalks. They started off well...


Here's what it looked like last summer when we first planted. I'm really pleased with it all. :)
Last summer, the daylilies were too small to bloom, but this year, they exploded.

TIP #2: 
If you've got your sights set on perennials like day lilies, astilbe, daisies, coreopsis, and lots more, and you're looking for a way to save tons of money, stick with the smallest plant when you buy because they grow so quickly 

Here they are this year...


...and this is last year, teeny tiny, and half the price (or more!) of the bigger plants. You can hardly see them!

TIP #3:
Take the time to prepare the garden bed before you plant

No, it isn't fun. But then again, neither is having to do all that work after the fact, and having to pay attention to delicate root systems and such. Plus, it looks so much nicer!

I thought I'd be okay with simply planting right into the grass, and even though this bed is being done in stages, it would definitely benefit from some mulch to tie it all together. I knew this, but I had a new baby and was exhausted, so it simply didn't happen until this year. I sure wish I had made myself tackle it at the very beginning. I knew better.


We purchased these five arborvitae from a grocery store, and at one point, I did not think they were going to make it. I was so mad at myself! What was I thinking? Thankfully they've survived and are growing a ton right now.


That pitiful little corner in the picture above was home to all the empty plant pots for, um, a year maybe. So bad. When I see those dead, orange Christmas wreaths still hanging up in April, I get a little smug and make judgments. Well, here's my dead Christmas wreath, ha ha. Judge away! Earlier this summer, it got a quick and easy reno.

It doesn't look like much right now, but next year it will look much fuller. The hostas were planted somewhere else but I wasn't committed to it, so they were added for free. The petunias in the front were leftover from that big clearance sale purchase, and the hydrangea in the back, also on sale, was under eight bucks. Well worth it!


One evening I started digging up all the grass, and this thoughtful guy came right over to help. He did a GREAT job and we finished in record time. I was so, so thankful for his helpful attitude and hard work. In case you ever get down about your little babies growing up, remember this. It helps. A little. Sigh.

TIP # 3:
If you can stand to wait, save some money and purchase annuals after the first "batch" has gone on sale, usually in mid-June here in the Northeast

I picked up several flats of petunias for under ten dollars! Petunias (in larger swaths of the similar colors) and other compact annuals add the perfect touch of color to empty garden areas. This was pretty boring before! (You can see that there is still a patch in the back that needs to be cleared out and mulched. Two words: budget and time. Running low on both these days, ha)


 This is too cute not to share, from June when the daisies are in bloom. :)


This is our side yard, outside of the fenced area. There's a major slope but here, unlike at our last house, I'm happy to simply let it be for the most part. This area is a nice backdrop for portraits, like Isabelle's earlier this year.


TIP #4:
Plant a living fence in the fall, and include several different types of plants

The only reason I added the small island was to gain some privacy for the pool since our neighbor's house sits high on the hill overlooking us. Super nice neighbors, but still kind of weird when we're out there swimming. :) I purchased all the plants after they'd been marked down in the fall. If you're using your garden bed as a living fence, choose at least two or three taller plants or shrubs, and vary them up a little bit. We would have planted a small fruit tree, but didn't want additional leaves and such blowing into the pool, but that's a great option too.

The other plants here are coral's bells and a cousin of sand cherry, whose name I cannot remember...oops! Will have to look that up!

A close up look at how things are filling in. All except one willow on the left (hill)- I can return that to Lowe's and they'll replace it, so I'll need to do that soon. The island plants look small now, but hopefully they'll take off next year. Willows grow quickly, usually anyway, so I had expected them to be quite bigger by now. The main shrub that will grow quite tall is a giant arborvitae. I'll add things if it seems sparse next year.


This is the real reason why landscaping matters to me: it creates a welcoming and pretty space to hang out together. And it looks terrific as a background in photos, which adds a wonderful quality to them.


I cannot imagine how some of my favorite photos would look without any flowers or foliage in the background. And I just love watching how it changes from season to season, year to year.

I don't know why, but the quality of photos keeps getting worse when I add them to the post- they look fine in my album, so that's frustrating. Oh well, it looks even better in person. :)

Here are some other landscaping posts I've written:

Planting a Garden Bed on a Serious Slope

5 Tips for Easy Landscaping

Tuesday, July 21, 2015

SUMMER 2015 HOUSE TOUR

I just love reading about other people's homes, so I thought I'd share ours. I'm joining the party with Momfessionals today. If you'd like to read a little background as to what brought us to this house two years ago, read this post. So if you're new here, our current house was built in the early nineties. And then just left for dead. Okay, okay, not dead. Just unconscious. Or in a coma. (A sad, ugly coma.)

We've poured a whole lotta love -and blood, sweat and tears- into this kitchen, all on a strict budget. There are kitchen posts here and here. We also tackled some kick plate problems, flooring, and updated the kitchen island with a little DIY ingenuity in this post.


Love this view every morning and every evening. This deck used to be the ugliest psycho pumpkin color you can imagine. Painting it was actually easier than I'd thought it would be, and it looks so much better! Our front steps were the same horrid color, and looked like bad cabin stairs to boot, so we did some more DIY on a budget. Still love that project!

The day we moved Ryder's doggie crate downstairs was one of the happiest days of my life...because it used to be in here! Ugh. The piano used to be in here on the left, and then that spot became my sewing nook. And now? Now it just serves its dining roomly duties. The way it should.

Last month I tore down the tired tan drapery panels that I'd gotten on clearance for our old house, and whipped these babies up. They're a calm grey with white quatrefoil and they open up the space beautifully. I change out pillows (fyi, throw pillows are the bane of my existence- I never choose the right size/color/shape/look...) seasonally so now we've got cool aquas, blues and greens going on.

Besides the dining room table, this is where the homeschool magic happens. And I write stuff.  =) Our music corner is to the right. The future plan is to find a large, comfy chair to create a proper reading nook over there in that sad little empty corner. It used to be my sewing office, but I just cannot handle that much chaos out in the open and on a regular basis. We shall see what happens here...

I'm not one of those who ban la tele in the bedroom. In fact, I kind of love it. Don't get me wrong, I don't even watch much TV, but I like that I've got options.

Step into my personal office space for a moment...this is to the left of our room. Truth be told, I'd prefer a master bath to a squat little office space. But. This Mama ain't got no options in that department right now.

Kid rooms- the middle boys chose their own paint colors and helped paint the walls. It was no big deal since the flooring was all being replaced. They did a super duper job! I love their cheerful rooms. Jose the beta fish dwells in this room. We lost Flame during our trip to Washington, DC this spring.

The Red Sox pennant over his bed fell off the wall...looks a tad bare here. Hulk the beat fish lives to the right.

And my girly girl's room. She talks about sharing this space with Baby Sister aaaaaalllll day long.  (Check out the adoption posts from the sidebar labels if you'd like to read about our most recent adoption journey.)

I did a recent update in here...


Yum.

So.Much.Better.


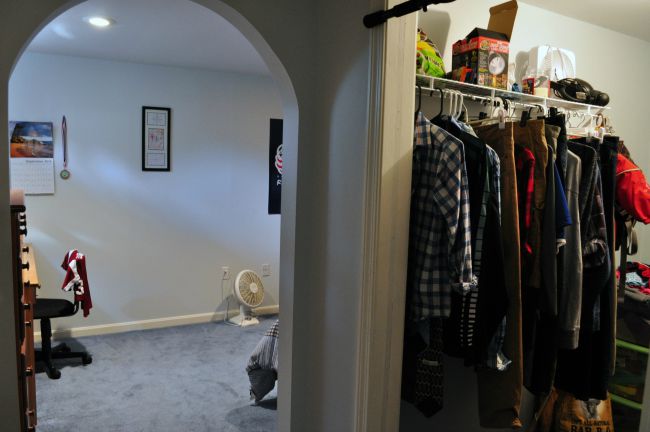
Our oldest son lives in the pit. I had mixed feelings about this, but it suits him and he really likes it. It works.

Diego the corn snake lives down here. I figure I'm either a really cool Mom or I'm simply neurotic. Jury's still out on that one.

And THIS! We just created this space out of, well, nothing but cold, hard concrete. The kids helped a ton, and I'm really proud of them all! This is, obviously, phase one of the rec room. It's pretty basic, but it's working great. I'm going to do an extra post on the dark beam we created which hides pipes and such, and the cheap, easy "fix" to the two 2x4's that are the post at the end of the stairs to make them not look like 2x4's.

Lastly, the landscaping. We've worked just as hard on the outside as we have on the inside! Landscape transformation posts here and here. I wrote about some helpful landscaping tips in this post.

So there you have it! I hope you enjoyed the tour!

Thursday, May 21, 2015

5 TIPS FOR EASY LANDSCAPING

Whether your yard is tiny or mammoth, the idea of landscaping can sometimes be completely overwhelming. Where do you start? What should you buy? Can we even do this? When we had our first two houses built, certain plants and shrubs were in the contract so I didn't really have much to think about. One day there was an empty patch of soil in the front of the house, and the next there were boxwoods, burning bushes, azaleas and rhododendrons. Pretty typical plants around New England. The builders even planted two huge Maple trees out front, as mandated by the city at the time for all new dwellings.

Well, this time around, there were no blank slates, so to speak. Honestly, it took much longer to un-do the landscaping here than to actually plant anything after we'd finished. But we've come a long way in just two years. All those previous years of getting my hands dirty, and making plenty of mistakes - that original "builder's" boring landscaping didn't stay for long!- have helped me streamline what I want my landscaping and yard to look like. Here are a few tips if you're just starting out, or if you're contemplating making some changes. I just love puttering around the garden and putting ideas into practice...hopefully these will be some helpful tips for you.

Tip #1: Make a plan (but be flexible)

Think about what you really want in terms of landscaping, and how much time you want to have to invest in keeping on top of everything. That last part of crucial. I had designed so many mulched garden beds in our last home and every spring I got a stomach ache just thinking about having to tackle those edges yet again.

Identify what areas are just for play- you don't really want to plant a garden bed or a tree right where the kids are going to play soccer and badminton; where you want some shade; a spot where you'd enjoy gazing outside at a beautiful plant, and letting its fragrance waft in through an open window. Do you envision a patio, or a fire pit to gather around? These are all important things to consider when designing your landscaping.

Once you jot some ideas down, head to the bookstore or library- or ask around your neighborhood!- to learn which plants thrive in your area. There are tons of resources to help you make your choices. Now add some good options to your list, or better yet, sketch out some of your ideas with plants in mind, keeping in mind their mature sizes and sun/shade needs. Next, pick up a few plants and shrubs and lay them out where you think you'll be planting them. Keep an eye on them for a few days, making sure they get enough sun or shade. Move them around to get a different perspective, too- much harder to move things after they're planted in the ground. I know! If you're creating a large garden bed, you may not be able to fill in every single spot, and that's okay. It takes time for things to grow, which leads me to the next tip.

Tip #2:  Plant groupings of one plant or shrub for the greatest impact

We've all seen that sad-looking sparse band of tulips around the base of a tree, or the hodgepodge garden where everything is out of sorts because there's just a little too much going on. Plant flowers and shrubs together in a group rather than a single "line" and row for a much greater impact. Groupings of three, five and other odd numbers work best- just one of the tricks of the trade, I guess, because they really do look so much better. I used to think that this would limit what I could plant, but it really doesn't. It actually allows the plant to pop because a group of them stands out far more than an isolated one does.

Now, if you're planning a foundation garden, by all means consider creating a solid hedge-like row to act as a gorgeous backdrop for smaller plants. Some people prefer to stagger the larger plants slightly to avoid such a uniform look- the choice is yours. I love hydrangea so I've planted several in a staggered row on one side of our house; but on the other side, I've kept things more cottage-like, with a bigger variety of specimen shrubs and flowers planted in groups.
  
Tip # 3: Don't overcrowd your plantings

More than likely, the plants you're putting in the ground are going to be much smaller versions of what they'll become. Give them room to grow. Maybe even more than you think. Yes, you'll have lots of "negative space" for a little while, but there's nothing worse than having to deal with a shrub that has outgrown its home in just a couple of years. Use colorful annuals to fill in bare spots, or choose a monochrome theme to add a certain elegance to your garden.


Tip #4: Work with the space you've got

You can't change the pattern of the sun any more than you can will the temperature to stay above freezing in the winter, here in New England anyway. I think it's great to try new things and be a little ambitious once in a while, but if you continually choose plants and flowers that just don't thrive in your area, I'm afraid you'll be constantly frustrated and disappointed.

When we moved in here, we had to deal with what we lovingly called "the pet cemetery" out front. Twenty years of neglect in what might have started out as a lovely little garden area with a few trees really left it unmanageable, unsightly and a pain in the rear to try to clean up. In the end, the best thing to do was simply clear the area and start over. Sometimes a fresh start is the best remedy to any situation. But there are other things that I simply cannot change, like the deep shade on the north side of the house or the severe slope in the backyard.

Try to determine what you need to accept and what you can try to change. Don't be afraid of making mistakes, or of having to change things up here and there. Experience is the best teacher in gardening. I've been designing and planting gardens for over twenty years now, and while I've got certain basics down, there is still so much to learn!

Tip # 5: Take time to enjoy the view (and photograph your hard work!)
 
This one is rather self-explanatory, but in all seriousness, get out there and enjoy those blooms! And don't forget to document your hard work. Some of my very favorite pictures are the ones of my children, smiling beside their "birth" trees, or standing in front of a sweeping mass of pink phlox- you will always have the perfect backdrop for any photos with good landscaping.

I hope this has given you some ideas, or at least a little inspiration. Now go grab a shovel and make something pretty.  ;)

Here are some photos of the landscaping in our current home:


You can see all the empty spaces- and this was before I added a dwarf Rose of Sharon tree toward the left there- but this year, these plants are coming back triple-sized and I'm so glad there's room to accommodate them all.

These Columbine, lovingly referred to as "rocket ship flowers" by our youngest son, are some of my favorites. They take center stage in the foundation garden out front.

These plants may be tiny when first planted (this was two summer ago), but they'll be taking up lots more room in just a couple of years.


After a fall spruce-up... more annuals- like these mums- fill in those gaps beautifully while the main plants and shrubs are still small and growing.

You can read some other posts about our garden transformations by clicking on the links below :
Phase One of the Front Yard Transformation

Front Steps Make-Over for Fifty Bucks

To read about how to create a rock garden and plant on a slope, click here.

The following photos were taken at our former home, where we lived for nearly eleven years. I'm planning on writing a post about creating living fences- prefect for those new construct yards the builders clear cut- and some tips for creating borders and hedges with tons of texture, interest and color. I miss our yard!


The right grouping of plants add an interesting mix of color and texture.


Another benefit to planting specimen trees is the joy in watching their blossoms burst forth each spring. This is my beloved Japanese cherry tree, planted in honor of our youngest son's birth.

 And a variety of trees gives plenty of nesting opportunities- what a joy to watch!


Yet my very favorite thing about landscaping is how you can create special places outside for your family. Not only do things look beautiful and interesting, but the spaces are useful and inviting. Every summer, we sought relief in the shade of a favorite tree in the backyard, and especially enjoyed dragging out beach blankets, books and lemonade for a fun, leisurely afternoon twenty or so minutes.  =)
.


Happy Gardening!

sharing with:
Sew Many Ways 
DIY by Design
Related Posts Plugin for WordPress, Blogger...