
On Friday my Mom and I had a date at the...HOBBY LOBBY! Yay! We have an HL here in New England now! And let me just say, after going there, I totally get what all you southerners have been bragging about all these years, ha ha! I had taken the brood with me last week for a "few" things and we bought out aisles 3, 4, and 5, but after a while the kiddos turned naughty and it was time to hightail it outta there. My Mom and I wandered around the place for a whopping four hours! I couldn't believe it! It was so much fun!
We had a lazy day yesterday, cleaning up a bit and hanging out, so after church this morning I was more than ready to hit the beach. Bill was ready to hit the hay- he was feeling awful and it was obvious the poor guy wasn't up for an afternoon of sand and sun. I hated going without him, but we did have a great time. I even ran into an old childhood friend of mine! Hi Pete...or Paul- the only identical twins I've ever known that I could never tell apart, ha!
So...onto the project...
One of our beach towels got a big tear in the center, but it was still in good condition otherwise so I didn't want to toss it. I kept thinking up ideas for how to reuse it or do something creative with it and I finally decided to try my luck with a beach chair caddy.


I didn't measure anything and the towel has stripes so that made cutting even lines a cinch. Of course I did have a few teeny tiny mishaps along the way (have you ever tried to take out stitches from terrycloth? um, yeah, that was IMPOSSIBLE!), but nothing that couldn't be fixed.
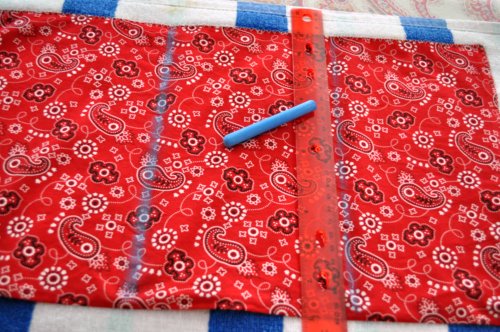
First I cut the desire size for the towel "envelope" that will fit over the beach chair.
Next I chose a leftover hunk of cloth for the pockets, folded it over to create a large rectangle- you will need the top to be the fold- and stitched the raw edges together (right sides together) along the bottom and sides. You will need to leave a small opening to turn the rectangle right side out. Press.
Stitch the rectangle to the towel along the sides and bottom.
I did a simple straight stitch and then reinforced the edges with a wide zig zag stitch- the pockets will need to be sturdy enough to hold full bottles of sunscreen and such. (I didn't bother to slip-stitch the small opening since the zig zag secured all edges to the towel.)


I must admit here that was it was slightly demoralizing to work on this project with a well-used towel, complete with stains, but...it's going to the beach so it doesn't have to be perfect and it's something that just would have been thrown away, so I'm happy to see it refurbished and given new life!
At this point I was going to simply stitch along the sides of the towel, right sides together, to form the envelope or pocket that slips over the top of the chair...but I wondered if it would slip off my chair if it got filled up with heavier items. (It didn't.) You could totally stop here and have a useful beach chair caddy, though I really do like the way I can roll the whole thing up and tie it together, keeping everything nice and neat.
If you want to add the ties, cut 2 long strips of towel, preferably along the finished edge so you only have to hem one side, and pin to the towel just above the pockets.
WAIT, STOP! This is backwards, which is what got me into trouble...Ignore this photo, go to the next one!

Stitch ties in place above the pockets.
Fold top of towel over ties and pockets and stitch sides together (right sides). I kept the side with the caddy pockets a tad longer than the plain side, but you can do it however you like.


Functional, pretty and I feel like I just did some very small part in saving our earth. =)
Linking up to these great parties...
Sew Can Do
Sew Many Ways
The Girl Creative
Hope Studios
Sugar Bee Crafts
DIY by Design
Tea Rose Home
Tatertots & Jello

1 comment:
Cute caddy. Maybe you could add a few extra smaller pockets on the front of the larger pockets so the little things don't get lost? And I did laugh out loud about your Pete and Paul comment. I could tell them apart in high school, but now I really struggle.
Post a Comment